|
||

|
|
Dash CoverAnother Little Saga ...Preliminary Thinking - Dave wrote - I've got lots of cogitating to do about our split and cracked dash. I found a wrecking yard in California (Russ' Recycling) that will sell me a mint-condition used dash (the entire dash -- not just the cover) for $185 - 200! That's a bit spendy, and I'm told the dash replacement job is a very difficult one. I have the dash cover that I ordered from Rocky Mountain Motor Works (now Mid-America Motor Works), but I need to study about the installation of the cover. It's not clear to me just how it goes on -- whether the old one has to come off first, how it fits under the metal defroster vents, things like that. Note: The catalogs give the dashes for '71-'72 SBs, then for '74 and later -- skipping 1973 completely. I guess 1973 must have been a weird year (Dave's old mechanic friend calls the 1973 model a "hodge-podge"). Perhaps it was a transitional year, a bit like 1967. Dash Cover Installation - Dave got his new dash cover out and laid it in place to do a little cogitating. The cover that was on the car went under the metal piece that runs from one side of the windshield to the other, and the fit was very tight. However, Dave found that the new cover slipped very nicely under the metal lip that runs along the bottom of the windshield. It was a perfect fit! Dave found that installing the new dash cover was a piece of cake. A little sanding around the edges, cleaning with alcohol, a bead of glue around the edge of the new piece, and on it went, with rubber tie-down straps and pieces of 2x4 securing it in place until the glue dried. It looks absolutely gorgeous! Note: Dave installed his dash cover with the windshield removed (had to remove it anyway when he had the car painted). That made it very easy to install the dash cover and to apply pressure on it until it dried (note the pieces of 2x4 and bungie cords in the photo below). It is possible to install the dash cover with the windshield in, but youd have to devise some way of holding it firmly down until the glue dries. Related Situations -
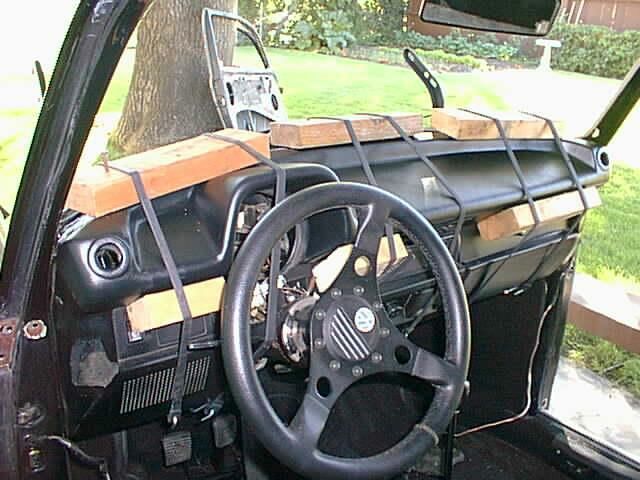 New Dash Installation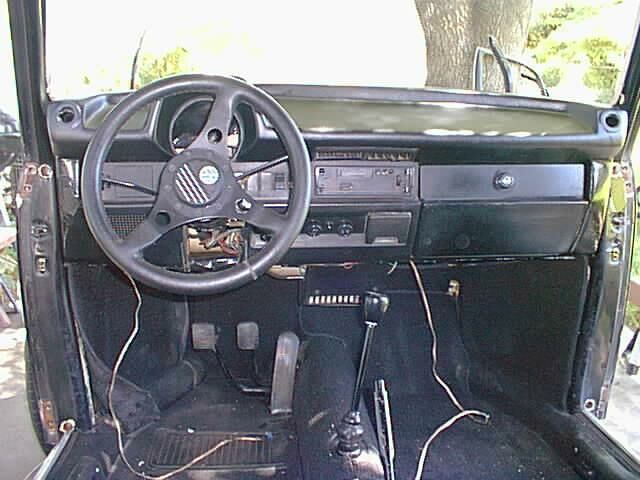 New Dash Cover
|
||
|
|