|
||

|
|
Door Replacement and AdjustmentSome Introductory Notes - It is possible for one person to replace and adjust the VW door by himself, but it is best to have two people to avoid any possibility of scratching the paint. Before beginning (and with the hinges still screwed up tight), open the door a bit and then pull the rear of the door up and down while looking closely at the hinge plate area in the door jamb. Any movement at all of the hinge plate inside the door jamb indicates there is a problem. If you find a crack in this area, the only solution is welding. Also, before you begin, have a really good look at the area around the bottom hinge. The A-pillar there (the front door jamb) can develop a rust problem at the bottom, and occasionally the lower hinge area can be affected. The hinge and retaining plate can be broken loose from the pillar so that no amount of adjusting will get it right. Again, only some expert welding will solve this problem. If you have the doors off you'll most likely be replacing the weather stripping. It's best to install the weather stripping after the doors are installed. It's only held with contact cement, so it's easy to install with the door held firmly by the hinges (and a foot under the outer underside to hold the door still). When reinstalling the doors (e.g., after having the car painted), we find it easiest to put the seats in first, then the doors. This way you will have less interference between the door and the seat than you would if you installed the door first; i.e., it will be easier to install the seats. A suggestion -- run some masking tape through your fingers to reduce the sticky (making it easy to remove) and stick it down the edge of the door jamb until the hinges are fixed with the first screws (you only need one screw on each hinge to hold the door in place before lining things up). This is the most likely area to get scratched if the hinges flop about while you're trying to get them in. Rob's one-man method is to get the door almost to the right height sitting on some bricks (with rags on top to prevent scratching the paint underneath the door). Then use your foot to hold the underside near the outer edge while feeding the hinges into place. Gives you 2-1/2 hands! :-) Dave uses his 2-1/2 ton floor jack under the door (with a 2x4 on top) to hold the door in place while making the adjustments and attaching the screws. The Procedure - Note: The objective here is to move both of the hinges upwards enough so that the door doesn't scrape on the underside, and in/out such that the weather strip fits snugly all around and the door closes flush with the rear quarter panel. Note: The hinge and striker plate screws see a lot of action as the door opens and closes, so they must be very tight. You will need an impact wrench to remove them. We strongly recommend adding a pneumatic impact wrench to your collection of tools (to go along with your air compressor). (See the picture below.)
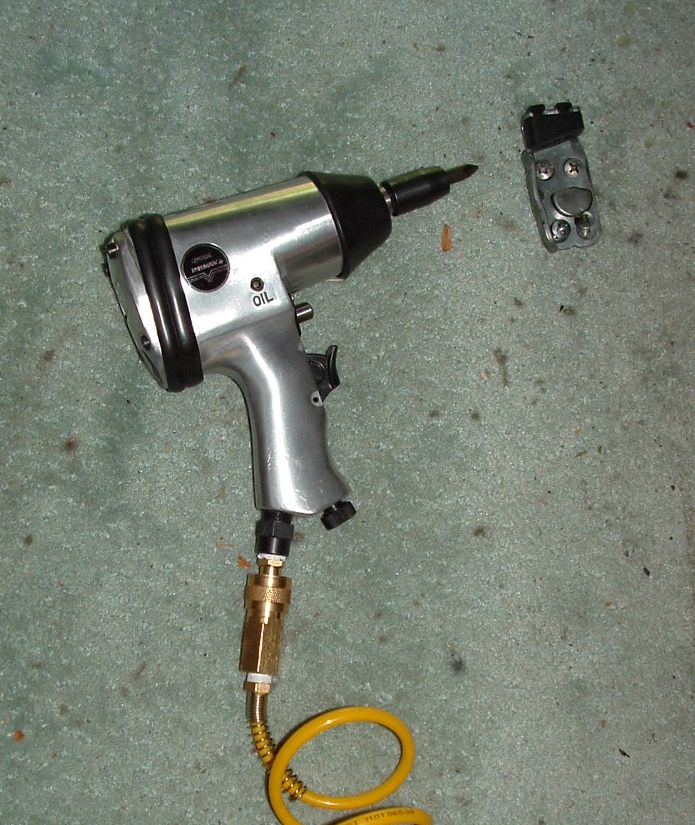 Pneumatic Impact WrenchBeing an occasional mechanic, Dave found that an inexpensive impact wrench like the one pictured above works very well, and saves a LOT of headache. Dave purchased his impact wrench at Harbor Freight Tools for less than $25. Note regarding impact drivers - make sure you get one with a "reverse" action as well as a tightening action, and use the correct (large size) Phillips head bit. If you don't get the right bit and you try to loosen the hinge bolts with an ordinary screwdriver, you'll ruin the slots in the screw heads and then you'll never get them loose -- they are VERY tight.
Note: The hinge bolts screw into a retaining plate which moves (but won't fall out if you remove the bolts completely), so the door can be adjusted in one place only (moving the whole top or bottom in/out of the car). Note: The door is heavy and awkward to maneuver. You might need a tire lever (padded) under the door and over the door sill (also padded) with the door partly open, to lever it up so it clears the sill as it's shut. Again, Dave uses his floor jack for the purpose, along with a bit of trial and error, tightening the hinge bolts only "screwdriver tight" between each trial. Note: A bit of thin padding on the sill is a good idea until you've got the in/out position set (just in case it slips down). Note: With the seats in the lowest door hinge screw might be a slight problem -- you may need an extension on the impact driver so you can get a good grip on the bolt. (With his pneumatic impact wrench, Dave didn't need such an extension shaft.) If you do have such an interference and find that you need an extension, you can angle it outwards just a little to avoid the side of the seat.
|
||
|
|