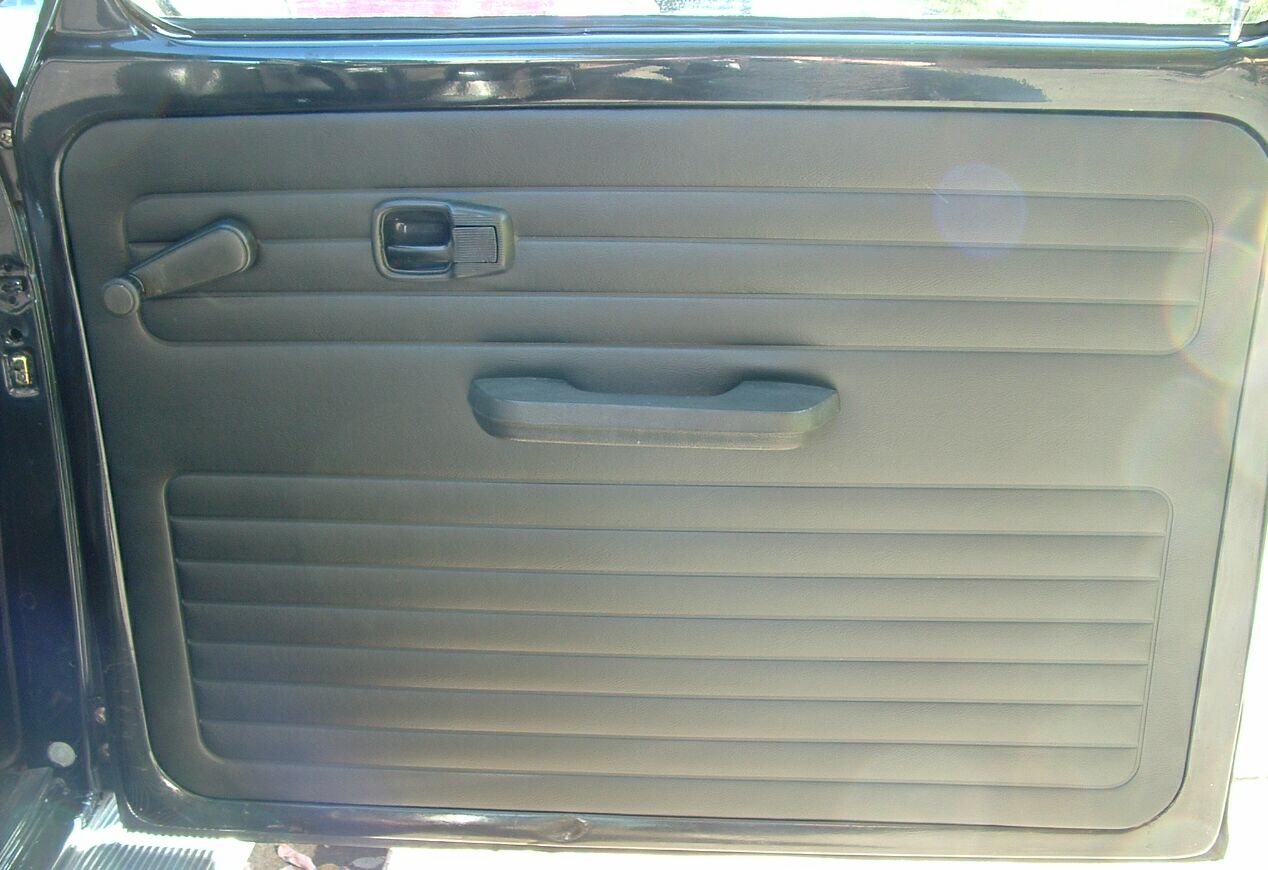
- Using a small screwdriver, carefully pry the finger plate out of the door latch trim (pry from the forward end). Remove the single screw that you'll see behind the finger plate and remove the door latch trim. Stow the door latch trim components in a safe place.
- Again using a small screwdriver, carefully pry the plastic trim off the window crank and remove the window crank screw. Remove the crank and stow it with the door latch trim (I use an appropriately-labeled large Zip-lock plastic bag).
- Turn the screw back into the crank for safekeeping (it's hard to replace if you lose it).
Note: Be careful during these operations to make sure you do not mar the finger plate or the window crank trim.
- On early cars, the arm rest is attached to the door trim panel from the other side, and stays with the door panel as you remove that panel - you lift the whole panel to slip the catch plate (behind the trim) off the door. On cars from about 73 onwards, remove the two large screws from the underside of the armrest and remove the armrest from the door; stow it and the screws with the other parts.
- On the earlier cars, after gently prying the door and clips free - working around the door), you then bend the top and bottom of the trim panel outwards just a little so the clips dont scratch the paint, and lift the panel off the catch plate behind the arm rest. On later cars, using a large screwdriver or small pry bar, carefully pry the door panel clips out of the rubber inserts in the door frame. Pry as close to the clip as you can to keep from damaging the panel. The panel will then come free of the door.
Note: Use padding (e.g., a rag or similar) to protect the finish.
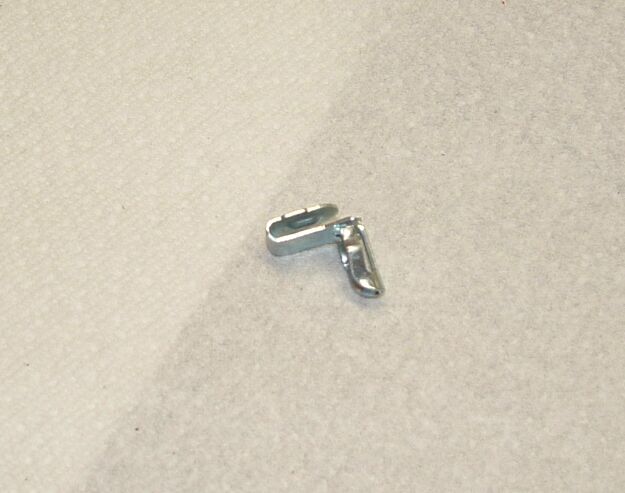
Door Trim Clip
~~~
- Carefully remove the trim panel and set it aside.
Note: This very straightforward procedure is complicated by the "cheap" (and I don't mean inexpensive!) replacement panels that are available today. They are made of thin pressed board (actually pressed sawdust!), and if you're not careful the door panel clips can pull through, breaking the hole out to the edge of the panel. This problem is very difficult to repair. So be VERY CAREFUL when prying out the clips.
- Inspect the protective plastic sheeting that is (supposed to be) attached to the inner side of the door frame.
Note: The purpose of this plastic sheeting is to protect the inner side of the door trim panel from water, which invariably will find its way into the interior of the door when it rains or when you're washing the car.
- If this protective sheeting is torn or missing, replace it in accordance with our Procedure for Reinstalling the Plastic Sheeting in the doors.
- If you are reinstalling the old trim, lay it face down on the floor on a piece of carpet if possible, to protect the vinyl covering.
Note: If you're really ambitious, you can improve the quality of your door trim by carefully removing the vinyl, all the way around. Then, using the old pressed-sawdust panel as a template, cut out a new panel out of Masonite or thin plywood. Make sure to drill holes and make other openings in all the appropriate places. Then fit the vinyl to this new panel and glue it to the backside of the panel, all around the edges.
- Go all around the panel to make sure the vinyl covering is firmly glued down around the edges. If not, reglue it with an appropriate cement (e.g., contact cement or "Gorilla Glue").
Note: It's essential that you hold the vinyl tightly against the inside surface of the trim as the glue dries. The last time I did this I used clothes pins for this purpose, spaced very closely together. This technique worked well, but it left indentations around the outside surface of the trim where the clothes pins had been. Next time I will use thin strips of wood (like a yardstick cut to appropriate lengths) under the clothes pins to spread the pressure.
Note: No matter what adhesive you are using, be sure to read and follow the safety precautions on the container. If you are using contact cement, read and follow our Safety Precautions.
- While the glue is drying, make sure that each of the holes in the door frame that the clips go into has a rubber insert. If not, install new inserts.
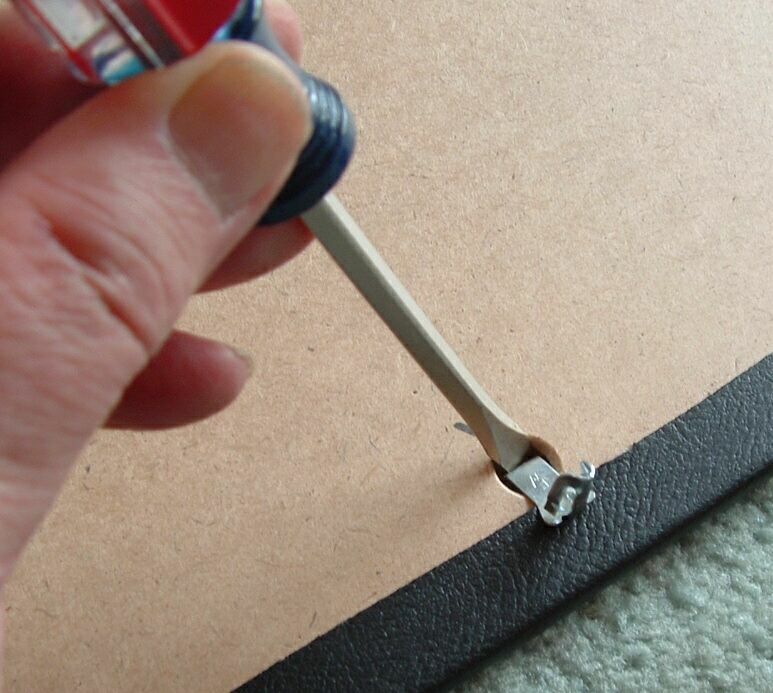
- Reinstall the clips in the appropriate holes in the reverse side of the trim panel. Orient the clip in the hole in the door trim such that the mating end is near the outside edge of the door trim. Otherwise you will have trouble lining up the clip with the rubber insert in the door frame.
Door Trim Clip Installation
~~~
Note that there are more holes in the trim panel than necessary. Make sure the clips in the reverse side of the door panel match with the holes/rubber inserts in the door frame.
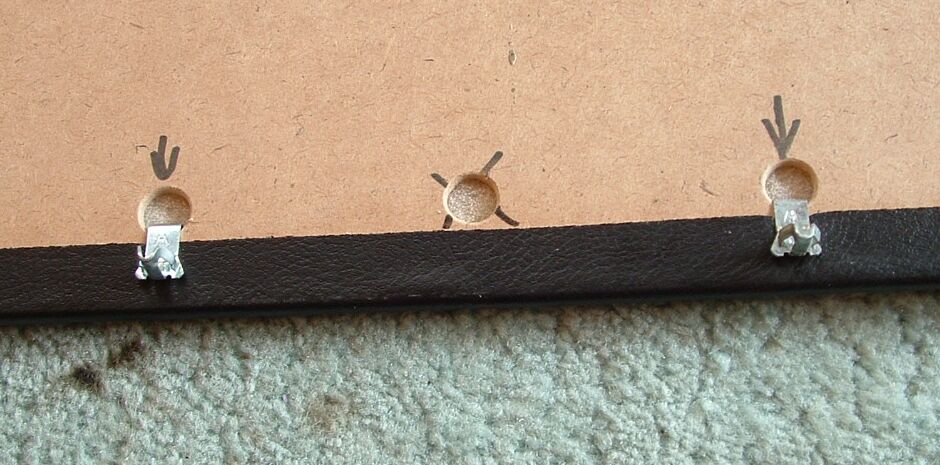
Too Many Holes
(One each top and bottom)
~~~
- Hold the trim panel up to the door frame and make sure there is a clip in the trim to match the rubber inserts in the holes in the car body. On the older cars with the catch plate behind the door handle, you will need to bend the top and bottom of the panel outwards from the door slightly to avoid scratching the door paint as you slip the catch plate downwards over it's "pocket" in the door.
- Gently but firmly press each of the clips into the rubber inserts in the door frame, all the way around.
- Replace the window crank, the door latch trim, and the armrest.
Note: I had a bit of trouble with the armrest. In the Super Beetle, the armrest is attached through the trim panel directly to the door frame with two screws. These screw into two white plastic inserts that are snapped into place in the door frame. I had a problem keeping these inserts in place so I could screw into them. I finally gave up and drilled a hole in the frame and attached the armrest through that hole using a long sheet metal screw.
Rob's note: When putting the window winder back on, wind the window up fully and position the winder handle so it's pointed upwards at an angle towards the windscreen. That ensures that you wont be constantly knocking your knee against the plastic handle with the windows shut - annoying for your knee and bad for the plastic handle. This is particulary important on RHD cars where your right knee is always close to the window winder as you use the accelerator pedal. Tighten the locking screw and replace the plastic cover on the winder.