|
||

|
|
Front Apron Replacement DiscussionThere is no question but what our poor little baby has been in a front-end collision as some point in its past, Dave wrote. The collosion collapsed the bumper brackets and pushed the bumper into the front apron -- thus the crease across the front and the deformation of the "shelf" (for lack of a better term) in the apron where the lower bonnet latch resides. An enterprising previous owner filled the apron with a thick layer of body putty, but now its cracking, and the bumper has bunged up the apron (and the bonnet) being so close.
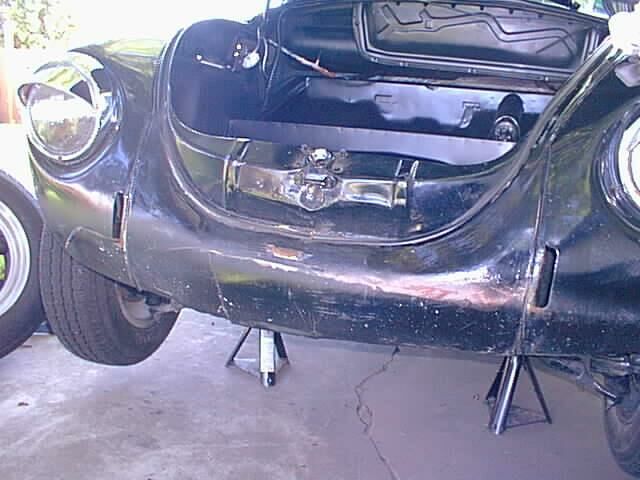 Scrunched Front Apron(Fuel tank removed)Rob wrote -- I can see how the old one has been crushed, and creased right across the front - it's no wonder your bonnet wouldn't latch properly! I cant imagine why someone would go to so much work and do so poor of a job when the front apron is readily available and kinda cheap ($50) and relatively easy to install. I've ordered a new front apron and associated stuff. The blurb in the J.C. Whitney catalog says that the front apron is a "bolt-on" item -- I hope it truly is; if not, Im going to have to find someone who is a good welder. I'm plowing new ground here! (Rob expressed doubt that the apron is a "bolt-on" item -- they certainly aren't on the standard Beetles.) Replacement of the front apron will be a chore, Dave wrote, but I'm pretty sure I can do it. I will have to remove the fenders, so I'll be able to fix the broken bumper mounting bolts without having to rent a right-angle drill! And the lower part of the bonnet latch will be replaced in the process. Maybe we'll get this bonnet to latch after all! I found the seam between the apron and the body on the upper left; the seam on the upper right has been filled in and painted over. So theres going to be some touchup necessary at that interface. Otherwise everything is either under the front of the car or inside the trunk (spare tire well). Theres some kind of mastic or something smeared all over the metal-to-metal interfaces that Ill have to get past -- probably a good idea to replace it once I get the apron on to make a tight seal. Ill probably have to remove the "crash" plate that is right behind the apron, but thats no problem -- I took it off when I replaced the shifter bushing. Dave posted a general question to the RAMVA newsgroup -- I need to replace the front apron on my '73 SB. The J. C. Whitney catalog says this is a "bolt-on" item. Anybody have any experience you'd be willing to share? I don't want to tear into this blind. Dave thought at first that the apron was simply bolted on, and the old one can be removed and the new one installed by removing two or three of the fender bolts but not necessarily the entire fenders themselves. If it IS spot-welded on but can be bolted together when replaced, Dave thought he could drill out the spot welds and do the job. John Connolly (Aircooled.Net) responded -- It's WELDED on, and requires the front fenders be removed for installation. JC Whipme strikes again. Someone else confirmed that -- The apron is spot welded in. Dave later confirmed that the apron is definitely welded on with a series of spot welds. Special bits are available for drilling out spot welds. They have a little pilot bit in the center, then a very small hole-cutter type bit around the pilot so that you can just drill through the metal around the weld. A friend took a look at the little spot welds and advised Dave to just center punch them and then drill them out with an ordinary drill bit. May even be possible to chisel them off. So long as they come off easy, Rob wrote -- you don't want to damage the body where the new one will be welded on. Rob wrote -- Any tips to drilling out spot welds? I'm not too experienced at that myself. Do you still have to break it free or does drilling the welds free the item fully? Dave wrote - I'm a poor one to ask -- I'm really making a mess if it. If the part you're removing is to be reused, I'm definitely not your man! :-) What I do is sand the area lightly, which sometimes (but not always) makes the spot welds show up more clearly (they're usually a little bit indented). The I give the weld a whack with a center punch to get the drill bit started, then just drill into it with a bit just a tad larger than the weld. I try to just drill through the outer piece, not all the way through, but I'm not always successful. There was an pictorial article in the January 2000 issue of VW Trends about removal and reinstallation of the front apron on a 57 Bug. Presumably the later models (e.g., '73 SB) would be similar. Kinda discouraging -- John Connolly is right -- not just a little welding -- a LOT of welding! :-( Dave thought that if he had the car painted he would just have the shop replace the front apron at that time. Someone wrote to Dave about welding -- Welding is really not that hard, he said. I have a spot welder ... it's an attachment for an arc welder that welds sheet metal from one side. I think it will work perfect for when I do my aprons. Following is Dave's progress in replacing the front apron -
Rob expressed two concerns -- Each side of the body piece has an attachment -- apron on one side and fender on the other. So if you add a strip of metal, you'll end up with one side or the other being "fatter". Just wondering if this would be a problem. It can't be left how it is - not enough meat left on that metal to support anything. The other possible problem is future rust between the old metal and the new strip -- the gap between the two will be a capillary for water. You might need to paint both pieces very well and then seal the gap in between with non-setting silicone as a water barrier. Rob -- Could you use a reinforcing strip BOTH sides of the damaged metal, and sandwich it? So long as you could keep water out of the sandwich you'd then have good metal for the bolt heads and nuts to bear down on. I would think that bolting the apron on would be OK if you need to do it that way. You'd need to use plenty of bolts of course - 22 spot welds per side were obviously there for a reason (keeping the front end of the body straight and aligned side to side is vital on the Supers since the front bodywork carries the front suspension).
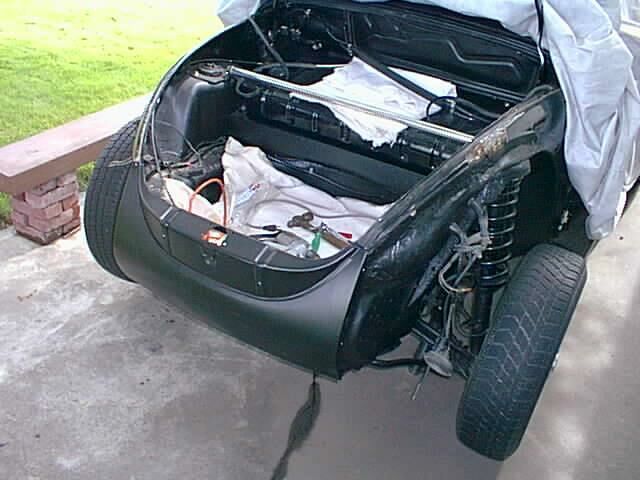
Newly-Installed Front Apron
|
||
|
|