|
|
|
Rear Seal Replacement
See also Rob's Rear Wheel Bearing procedure.
In response to a query about rear axle seals, Rob wrote -
The rear axle repair kits probably come with parts for both the IRS and the swing axle bug, as many countries still had swing axles in 1969 (The "poverty pack" 1200 bug sold in the UK and eastern Europe had swing axles up to 86!).
The IRS axle (which uses grease for lubrication) has an inner sealing ring which rides on the inside spacer next to the ball bearing, an O ring which goes around the outer roller bearing and an outer grease seal which rides on the outer spacer. That's it.
The swing axles have a more complex system to seal the tranny oil they use for wheel bearing lubrication. There's a paper gasket under the axle cover plate (4 bolts running through it) then (from the outside going in) there's a large oil slinger washer (to throw any leaking oil at the oil drain slot behind the cover plate before it moves out along the axle towards the brake drum), an oil seal on the axle, and a small and large O ring which sit against the outside of the wheel bearing itself, sealing against the inner and outer bearing races.
Use only the parts designed for each type of bearing system.
~~~
Note: The following procedure was adapted from a the experience of C. P. Andres Carranza, who lives in Mexico. We have preserved Andres' language for the most part; his English is excellent, but sometimes just is a bit difficult to understand. Andres' experience is certainly valuable, and we will clarify as our understanding increases! :-)
Andres prefaced his procedure with this note -
I had to change the seal again since I damaged it. The technique I used last (was) to use the old seal -- you put the new seal in its place (you can use some oil to help it in) then push it in. When it stops put the old seal onto the new one backwards and then hit it lightly with a hammer around the edges. This way you don't damage the new seal as you put it in.
- Block the front wheels to prevent movement.
- Fully release the parking brake.
- Back off the brake adjusters slightly.
- WITH THE REAR WHEELS STILL ON THE GROUND, remove the cotter pin from the castle nut on the rear wheel shaft. Mark both the nut and the end of the axle where the cotter pin went thru so you can torque the nut to the same place when replacing it. Break the rear axle nut loose with a 36mm (1-7/16" socket) on a 3/4-inch drive breaker bar and "cheater" -- a length of pipe about four feet long to slip over the braker bar to give more torque. Remove the castle nut, then raise the rear of the car and support it securely on jack stands.
WARNING -- Loosen the two castle nuts (one on each side) while the car is on the ground. The castle nut should have at least 217 ft-lbs of torque on it -- the leverage needed to remove it is enough to topple a car off the jack-
stands. The key to safety is to always place the socket onto the castle nut so that the breaker bar and cheater will be pressed downward.
Note: If you car is equipped with spinners (like Dave's is), the castle nuts will not be accessible with the wheels on the car. After removing the rear wheels, Dave had success with lowering the brake drums down onto large blocks of wood and firmly appling the parking brake. This plus the weight of the car on the wooden block held the brake drums in place while we removed and later replaced the castle nuts.
- Loosen the wheel lug bolts/nuts and raise the rear of the car and place it securely on jack stands.
- Remove the wheel lug bolts/nuts and remove the rear wheels.
- Back off the brake adjusting stars, then remove the brake drum from the splines in the rear wheel shaft.
Note: You may need to apply a little friendly persuasion using a rubber mallet. Dont use a regular hammer -- you dont want to damage the drum!
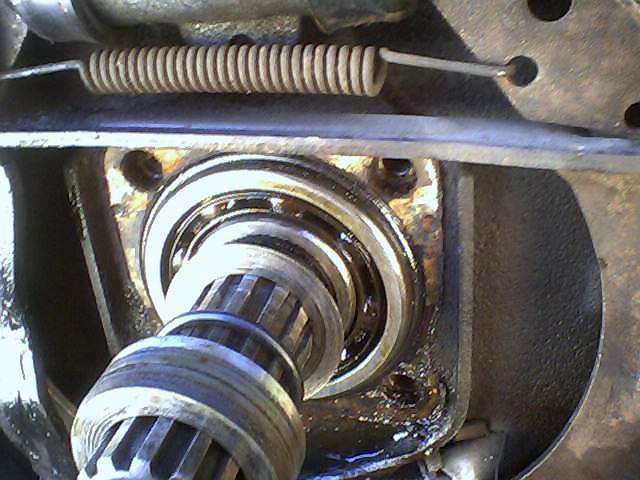
- Once the drum has been removed you will be facing the bearing cover (inside is the seal).
- At this point make sure that the oil leaking from the rear axle is transmission fluid and not brake fluid leaking from the wheel cylinder.
- Once you have confirmed that the leak is indeed from the rear axle, determine (from reading the procedure below) the tools you will need, and lay them nearby for easy access.
- Remove the four 14mm bolts that hold the bearing cover in place.
- Once the bearing cover is removed the seal (blue or dark blue rubber ring) O-ring and the paper gasket will be visible.
Note: There is a metal spacer and an oil slinger metal washer; between them there is a small rubber O-ring gasket (which you will replace).
Rear Seal Components
~~~
- So at this point clean all that oily mess... Start with the axle (the easy part).
- Take off the spacer and watch how it goes, the plain side is outwards. Clean it.
- Take off the O-ring and washer. At this point or even before some oil may leak -- no problem. Clean those parts.
- Now, take in the washer and a new O-ring (it's in your kit).
- Put in the spacer. Watch that the uneven part goes toward the O-ring and the plain outwards, so when you install it you see the plain part.
- Now let's go to the cover...
- Remove the paper gasket if there is one, remove the big O-ring if any, and last remove the seal.
- To remove the seal, push it from the outside of the cover, where you see the washer. If it doesn't go out, put it on the ground and hit it sofly with a screwdriver and a hammer, TAKING CARE NOT TO SCRATCH EITHER THE WASHER NOR THE COVER.
Note: Don't discard the old seal yet -- you will use it to install the new seal.
- Once the seal is out, clean the washer and cover, then put in the washer and install the new seal as follows -
- Put some oil around the seal and push it in as hard as you can.
- You probably won't get it completely in, so use the old seal -- put it face to face with the new seal in the cover and push them in. If not enough, use a light hammer, being careful not to smash the new seal. If you damage or distort it, like I did first time, you will have to change it again.
- Once the new seal is in, put in the new big O-ring and the paper washer.
Note: When assembling be careful not to let anything fall.
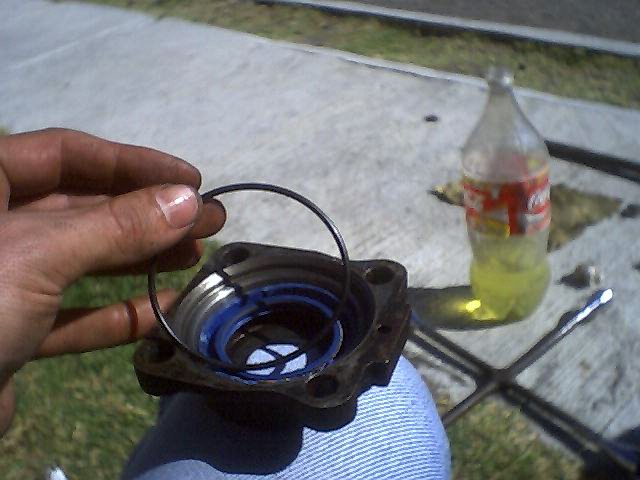
Big O-Ring
~~~
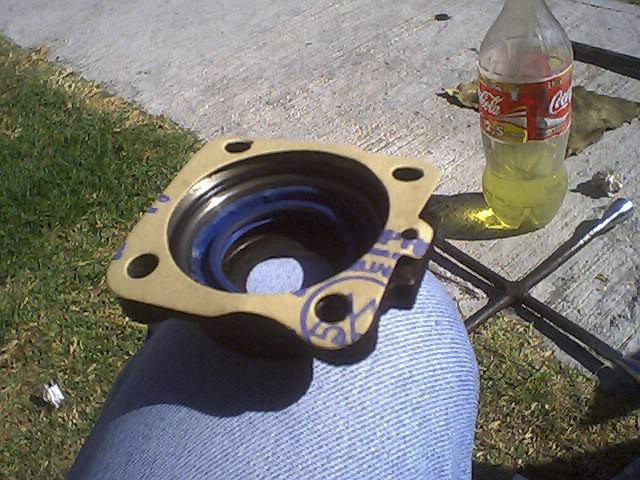
The Paper Gasket
~~~
- At this point you can assemble the parts. When replacing the cover pay attention that the seal will go around the spacer. It has to enter smoothly, or the spring seal will jump out of it's place. You can do like I did - take the spacer and put it in the seal and carefully put them on the axle.
- Now that all is done, check the brake lining to see if it's needed to replace them the brake shoes. If so, see our Brake Shoe Replacement procedure.
- Replace the seal cover, install the brake drum, and the wheel and then the axle nut. At this point you also can spin the wheel (if it's on the air) so you can hear if your bearings aren't worn.
- Lower the car to the ground and firmly apply the parking brake.
- Torque the axle nut to 217 ft-lb.
Note: Hopefully you marked the axle nut and the end of the axle so you can return the nut to the same place (i.e., achieve the same torque). If not, and if you don't have a torque wrench that reads up to 217 ft-lb, measure the length of your "cheater" bar and estimate the amount of weight you will have to apply to it to attain 217 ft-lb. For instance, if the total length of your "cheater" is four feet, you will have to apply 54 lb to the end of it to get 217 ft-lb on the axle nut. It's okay if it is a little over, but it must not be under 217 ft-lb.
- Check the wheels after a day or two for leakage; check again a week later.
*
* * * *
|
|
