|
||

|
|
Windshield WipersNote: Much of this article reflects Dave's experience with his '73 Super Beetle. Hopefully it will be useful to other models as well. The following topics related to the windshield wipers are discussed in this article -
|
||||||||||||||||

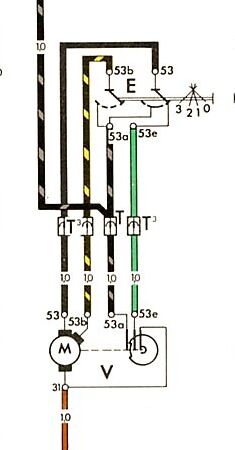
Wiper Switch Wiring(1973 Super Beetle) |
|||
Black |
Green |
Black/Yellow |
Black/Gray |
Regarding removal of the wiper motor, someone wrote - The part that appeals to me the least is unplugging the electrical connector below the steering column and then I guess fishing the wires up through the maze under the dash and through the hole in the firewall. The reverse will be even worse -- getting the wires back through that maze to the connection point.
Rob responded - On mine the wires (four as I recall) can be disconnected at a screw connector block on the side of the wiper gear box. They are all the same colour on mine (brown) which is making it very difficult for me to trace the right wires from wiper to switch.
There is a very tight hole in the floor of the luggage area above the steering column for the wiring loom, but the wiper wires don't use that hole at all, so I guess your harness must look different to mine.
Unlike modern cars, VW didn't put a simple plug on the back of the steering column, so you have to feed what wires you can up the column as you pull the blinker mechanism upward, and of course you soon run out of free wires to do that. The only way of getting it right out is to disconnect all the ends from the fuse panel and pull them down into the car!
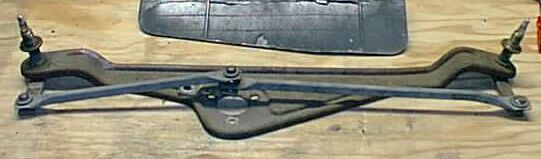
Wiper Assembly and Motor Removal
Note: A complete procedure for removing and installing the wiper motor and frame is given in the Bentley Manual at 10.2 and in the Haynes Manual at 12-15.
Dave wrote of a problem he encountered while getting his '73 Super Beetle ready to be painted - I know I must remove the windshield wiper motor and just leave the two holes in the body, then put in new seals when I put it back together. BUT -- I cannot get the nuts off of the wiper shafts, immediately outside the body where the shaft sticks through. The whole threaded sleeve around the shaft turns, and there is no way to hold it on the other side. I'm really stumped over this one. I've shined the threads up nicely with a wire brush and hit it with a squirt of Kroil (penetrating oil -- see our Automotive Chemicals and Lubricants article), but still, not being able to grab a nut or something on the other side, I can't figure out how to get those nuts off. The sheath (the threaded bearing part with the wiper shaft running through it) is firmly attached to the wiper frame underneath - welded in place on the frame. It shouldn't turn as you turn the nuts on the outside.
Finally, knowing that he was going to be able to replace the entire wiper arm assembly, Dave grasped the wiper shafts (actually the sleeve with the shaft runs through, which is supposed to remain stationary) with a vice grip so he could hold it still. Then he was able to remove the nut -- bunged up the threads on the sleeves a bit and had to apply a little extra torque to get the nuts past the ruined threads. No sweat, as the sleeve in the new/used wiper arm assembly were held tightly and did not rotate with the shaft.
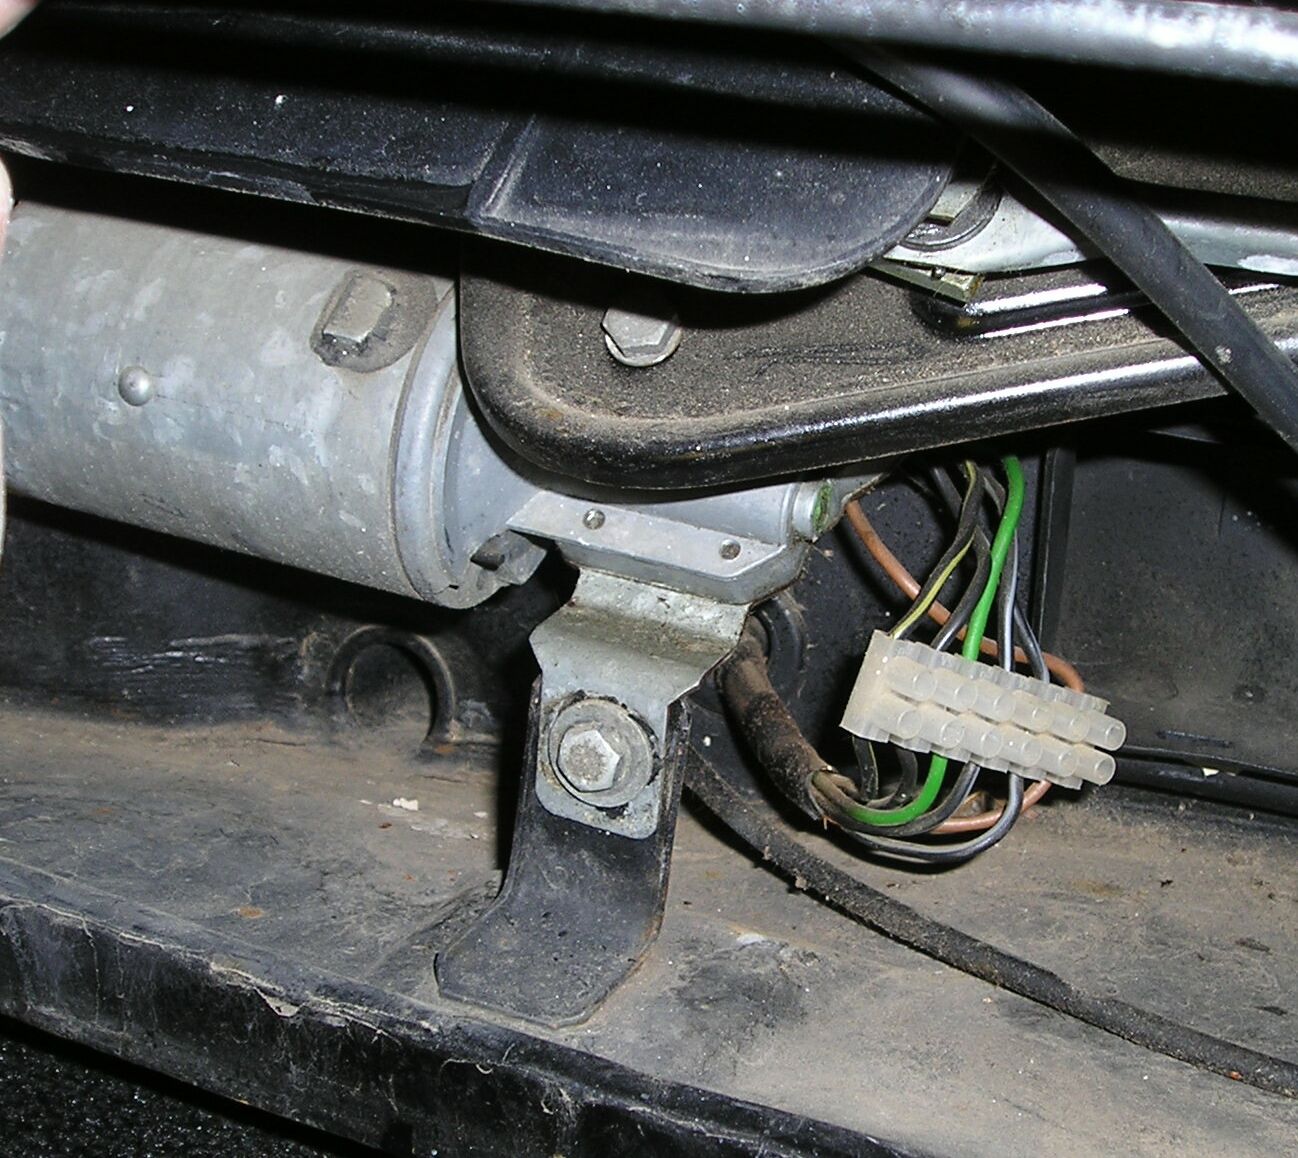
The can of the motor is mounted on the side of the gearbox, and the wiper-arm frame mounted to the gearbox too. This is different to the curved screen bugs -- the wiper arms would have to be in a different position. The wiper motor in the '70 Standard Bug (e.g., Rob's) can be removed from the gearbox easily enough (taking care of the wires leading from brushes to connector block), but getting it back on is difficult as you have to withdraw the brushes so the armature will slip between (as the motor goes back into the gearbox) and there is NO room to do it, apart from the access slots for the two nuts which hold the motor in place and the gap between motor and gearbox before it slide home. Rob eventually did it by wrapping a thin loop of copper wire around the brushes and pulling them into the retract position whilst sliding the motor back into place, then letting go one side of the copper loop so the wire could be withdrawn through the crack between the motor and gearbox before it was fully pushed home. You need 4 hands for that job :-) There are three brushes - one is common and the others are for high and low speed.
Regarding removal of the wiring -- it was suggested to Dave that the easiest way to get the wiper motor out would be to cut the wires (to be respliced later). It's easy enough to make a connection block up later to reconnect them. Dave was tempted to remove the plate on the back of the wiper motor gear box that all of the wires are attached to, but he was afraid of the hornet's nest he might open up. On the one hand, it might be a good way to detach the wires; on the other hand, not knowing just what's in there, Dave thought it better to do it on the work bench rather than at the awkward angle it's in still attached. Rob concurred that cutting and re-splicing the wires might be easier.
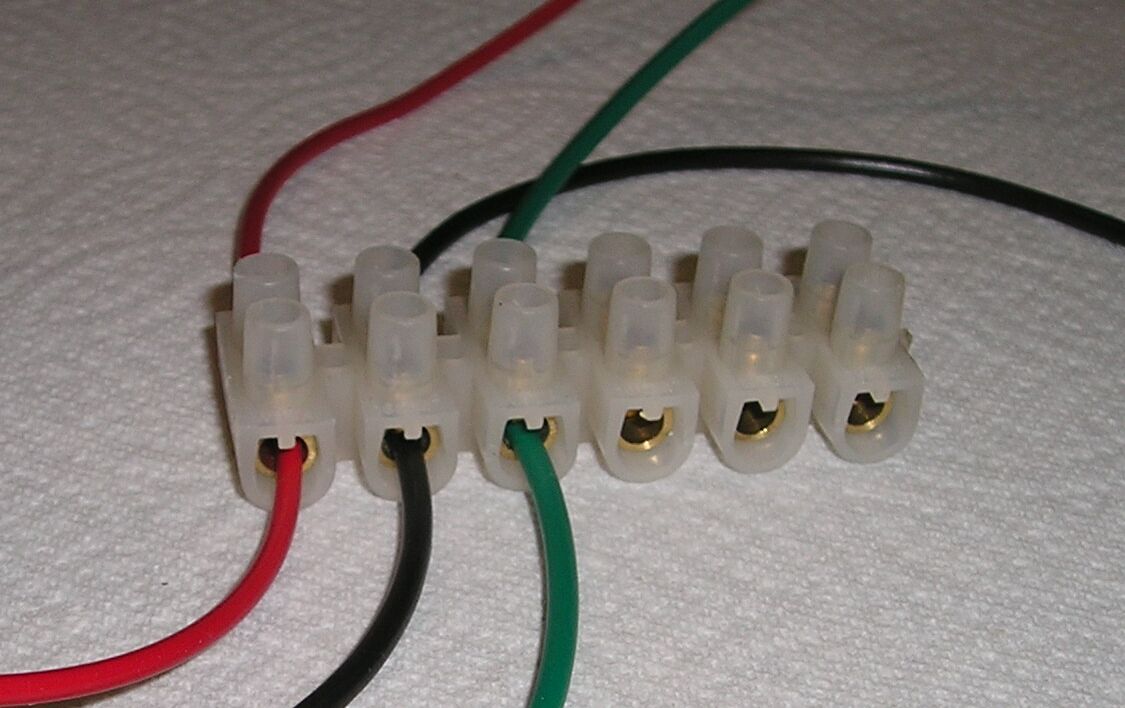
Dave did cut the wires, then considered several methods of reconnection -- butt connectors, spade connectors -- and a "connection block" -- a device that you insert the two ends of the wire(s) to, and it provides the connection between them.
Rob described the connection block - What I had in my mind was the plastic 240v connector block we can buy here and I assume you'd have something similar there (110v or 220v of course). Here they are a strip of 10 two-ended connectors each with two set screws inset in the plastic and screwing down into the brass collar inside, so with each wire join you poke the wires into each side, screw up the screw on each wire, and you're done. You break off the block for the number of wires you wish to join. This kind of connector means you don't have to shorten the wires by twisting them together, and they make a "continuous" wire join - the ends just point at each other inside the connector for a straight-run join. Using a block of connectors makes for a neat join of several wires, and the plastic of the block means you don't need any extra insulation. They are light enough that they can just hang in the harness too - doesn?t need to be fixed. The only problem might be water if it's inside the air box near the wiper motor.
So long as they are rated at 10 amps or so the voltage doesn't matter.
Dave wrote about a connection block he found in England that worked well - he was not able to find the device in the U.S. The block that Dave purchased in England is shown below, with wires attached.
 |
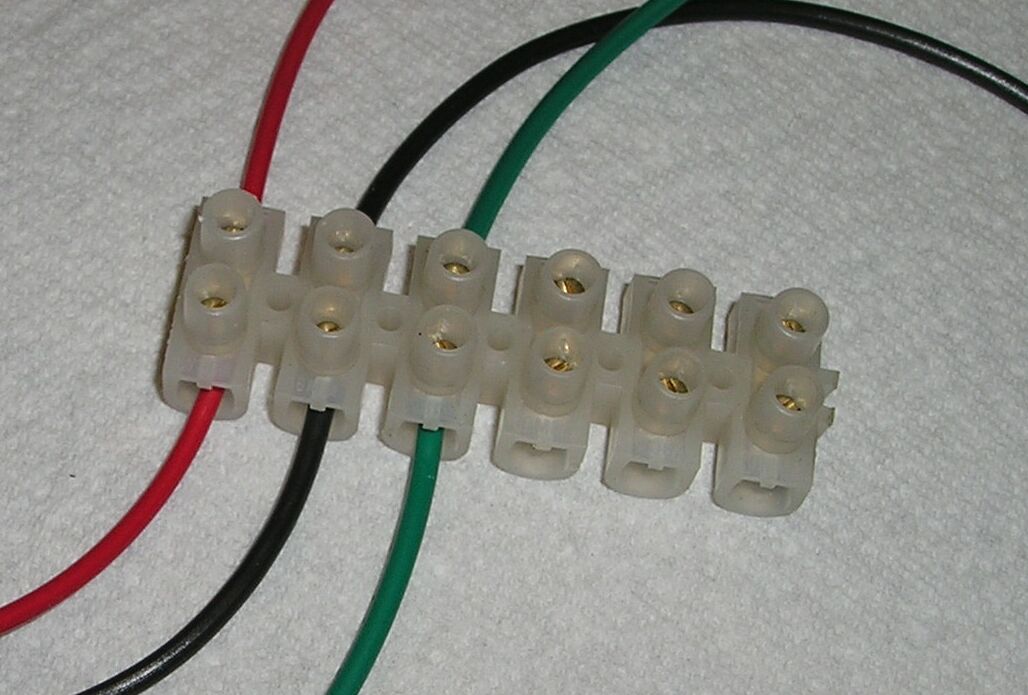 |
Electrical Connection Block
Motor/Gearbox
VW wiper motors are quite tough. Rob had his apart for the first time in 28 years, and the brushes were okay. The outer bearing was almost dry, but a little grease put into the bearing cup (buried down the back of the motor can, which is why it can be taken right off so you can play with the brushes afterwards) with a thin screw driver fixed that (after twirling a rag inside the bearing (on the end of the same screwdriver) to clean out the traces of old grease. Only use a light grease though - don't want it slowing down the motor in freezing weather. :-)
The gear box should be regreased while you're there. The gearbox is a simple worm drive, the gears easily repacked with the same light General Purpose grease. Rob didn't dismantle the gearbox output shaft since it felt free - he just put a drop of engine oil where it comes out of the box to drive the wiper arm - a little will work it's way in with capilliary action. He used a thin smear of the same General Purpose grease on the wiper arm pivots and shafts. With all that done, it Works very smoothly now, Rob reported.
"Speedy" Jim says the worst that happens to the wiper assembly is the grease in the gearbox gets stiff with age.
Rob added - And it tends to be left stuck to the outside -- not touching the gears any more. I though it prudent to use some General Purpose grease and pack a reasonable amount in (after scrapping out most of the old stiff stuff) so it should keep grease on the gears for a few years at least. I don't know whether the GP grease is similar to the stuff VW used, but I made sure it was NOT a lithium grease, (which is used in wheel bearings). If I remember right, the stuff I have is a 1-lb tin of Castrol LM.
Even if you decide against dismantling the gearbox and motor, you'd definitely need to repack (smear) the wiper arm bearings - they are plain bearings and need some lubrication. The outer end of the arm shafts are exposed to the weather, so no grease means more likelihood of water getting into the bearing.
Motor Disassembly/Refurbishment
Note: It might be worth more than the motor to get it worked over by a shop. Generally, if a motor has some internal problem, it's cheaper and quicker to simply exchange it for a rebuilt or new unit. New/used wiper motors are readily available (e.g., from Russ' Recycling). If you're not sure about stripping the motor itself and is still works with the repaired frame/shafts, it would be wise to just use it as is and save your money for another pressing job.
Motor Testing
There is a good schematic and writeup on wiper motors on "Speedy" Jim's Web page.
"Speedy" Jim also wrote -
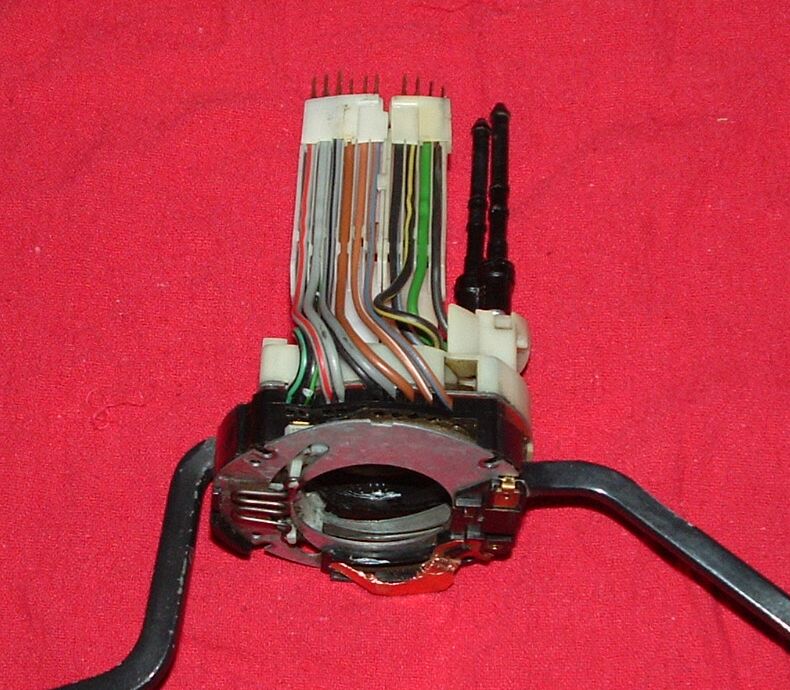
A simple test would be to check Fuse #10. Even if it "looks" OK, pull it out and polish the holder contacts. Check the plug in the steering column for the wiper switch. These can easily get pulled apart slightly and don't make contact. Make sure it is fully seated.
After that, I would do some electrical tests with a 12V test lamp. Access the plug/socket wires on the column. Switch ignition on. Set the wiper switch to high speed position. Locate the Blk/Yell wire and touch the test lamp to its plug contact (don't pull the plug apart for this). If the lamp lights, power *should* be getting to the motor. If it does *not* light, the problem is probably not in the motor.
Another simple test would be to connect terminal 31 to negative (either at the brush or the cam switch connector), and either 53 (low speed) or 52b (high speed) to positive. If the motor does not run, it is generally quicker and easier, as we said, to just replace it.
When comparing two motors -- if you can find a way of loading the motor (grabbing the operating arm, etc.) you'll get a better idea if one is working better than the other.
Have a look through the two slots in the motor casing for excessive sparking (worn brushes) and listen for dry bearings at the outer end of the motor case and the gearbox end. It would be worth taking the gearbox cover off and repacking it with light GP grease (NOT lithium wheel bearing grease) even if you decide not to dissasemble the motor section (it IS hard to get back together again). The grease needs to be a light grease, especially if your winters are very cold. If you use a heavier grease, the wipers will be slowed more than they should be (and VW wipers aren't fast anyway).
Wiper Reassembly and Reinstallation
One of the first things you will do after having the car painted is to reinstall the wiper motor.
Dave wrote of his success - I bolted the newly-painted newly-lubricated new/used wiper arm assembly to the wiper motor, then slipped the pivot shafts up through the holes in the body and bolted everything into place. Then I turned the wiper switch on and watched the arm assembly go round and round and the pivot shafts go back and forth. Hooray!
It is a bit difficult getting the wiper blades onto the arms if you haven'd done it for awhile. The instructions are a bit difficult to follow -- a series of pictures. With the arms installed on the pivot shafts, pull the arms up off of the windshield (windscreen), then slip the "U" on the arm right through the center slot on the head (actually moving the head, not the arm of course, since it's attached to the shaft) far enough that you can insert the catching piece in the center of the head under the "U" in the arm. Then when you rotate the head into the normal position, it can't come off.
Note:The blade assemblies come with three adaptors -- one in the assembly and two others. The instructions are VERY cryptic and require careful study to be understood. Dave finally found that the adaptor (arm to blade assembly) that was in the blade assembly was the wrong one for the new arms; once changed to the correct one, putting the arms and blade assemblies together is very easy.
Wiper Blade Adjustment
A common problem when reassembling the wiper arms onto the rotating shafts that protrude through the body is that one may go down onto the hood and the arms stop in the wrong place.
The fix is to pull the arms off the splines and rotate them a bit before putting back on the splines. They sometimes need a little levering to get off the spines (after removing the locking bolt). If you turn the wipers off, then positioned the wiper blades onto the splines in the wiper shafts such that they were in the stopped position right where you want them, they should work fine. On older Bugs the arms sit on splined shafts, and it's a simple matter to undo the retaining bolt, pull the arms off and turn them before putting back on the spline. On later models, they aren't adjustable - just a locking bolt under the arm which sits in an indent on the smooth shaft.
As a final test, turn the wipers on with the arms lifted up off the windshield -- they'll stay there quite happily rotating in the air (if they are normal VW wiper arms...). This allows you to park the wiper motor, then put the blades down on the screen and adjust the arms on the splines if necessary. The arm sitting flatest to the bottom of the screen needs to be almost on the windscreen rubber. Then turn on the wipers and turn off the ignition at the "high point" (as near as you can get it) and make sure the other wiper doesn't quite touch the right side of the screen with it's tip. That arm should then sit low on the screen too when you turn the wipers back to park. But it may be a little higher than the other blade. That gives the maximum sweep without either blade bumping the windscreen rubbers.
Wiper Blade Replacement
Replacement of the wiper arms/blades is easiest if the entire arm/blade assembly is replaced. Removal of the blades from the arm assembly is quite difficult. The whole assembly isn't very expensive.
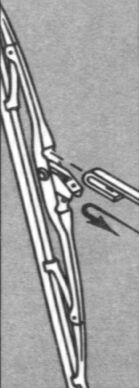
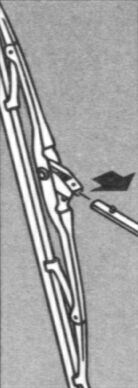
Replacement of the wiper arms/blades is illustrated in the following pictures.
Removal -
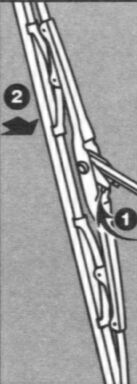 |
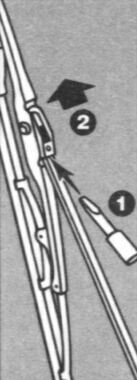 |
Replacement -
 |
 |
Wiper Assembly Interchangability
(Rob?s Experience)
Rob posted to the RAMVA Newsgroup - This morning on the way to work the wipers on my '68 Bug failed. I suspect a motor problem (reluctant to move, then a couple of wipes -- sometimes -- and the fuse pops). Replacement fuses pop at the same rate.
Anyway, as a quick fix, will the total wiper assembly (motor, gearbox and arms etc) from a ?70 fit in the ?68? I have a ?70 beetle being slowly restored, with a good wiper assembly in it.
The ?68 has the older style oval shaped can over the motor, similar to the 6v wipers; but is, of course, 12v. The ?70 has the later style side mounted cylindrical motor.
If the ?70 assembly will fit the ?68 car then I can change it tonight when I get home and worry about fixing/replacing the ?68 assembly at my leisure.
Response #1 - From "Speedy" Jim -
The wiper shaft diameter changed sometime around then. Compare that before you even open the hood. Also check the spacing distance between the two shafts.
Response #2 -
I "updated" the wipers on my '69 to ones from a '73 Super. The entire assembly is different, and the motor mounts differently. It seems the wipers on '68 and '69 were unique to those years (like so many other things).
I ended up using the old motor and other parts, and drilling out the ends to accept the '73 wiper shafts. The shafts are a larger diameter and you'll need the correct grommets from the later years, so they'll seal on the body.
1970 was when they made the change to the larger shafts, but I believe the whole shebang should fit right in.
Response #3 -
Sounds like a lack of lubrication on the linkage to me. I would check that out before replacing the motor.
Response #4 -
Sometimes the shafts themselves will corrode inside and strain the motor, popping the fuse. A few drops of oil in them may solve the problem (temporarily).
Rob reported - I decided to look at the '68 wiper assembly before trying to swap to the ?70 assembly, since I KNOW it fits without modifications. No problems with the shafts/bearings, all are free and working OK (lubricated them anyway).
The motor spins just fine on both speeds when direct wired, so no problems there. But when reassembled it's still blowing fuses - it looks like it's either a problem with something shorting in the parking mechanism in the gearbox, or in the wiper switch itself. So swapping the 70 wiper assembly MIGHT have cured it, or might not. I'm leaning in favour of a fault in the parking mechanism, rather than the wiper switch.
A couple more tests to do tonight to isolate it (direct-wire first to the contacts on the motor head with all the connectors off so the wiper switch is out of the cirtuit, and then if necessary direct wire to the red/black wires at the motor head itself, bypassing the parking mechanism, and maybe I'll have wipers again if I can find the problem.
I'm a little leery at completely removing the gearbox cover - the red/black wires to the motor head appear to need desoldering so the parking mechanism can be removed WITH the gearbox cover. It looks like it would be a bear to reassemble. So I haven't been able to physically examine the parking mechanism itself yet. Anyone have any suggestions here?
I may have to try the conversion to ?70 wiper assembly tonight if the fault appears to be in the parking switch component of the ?68 motor/gearbox.
It rained on the way to work again today -- ever tried reaching out the side window with a wiper blade in your hand to wipe the screen in front of your face -- not fun, and not too safe either!
Thanks to all the good comments to my previous post -- at least I know the ?70 assembly will fit with minimal modifications if I have to go that route.