|
|
|
Door Window and
Regulator Installation
(Including Felt Channel and Window Scraper Removal/Reinstallation)
For more information, please see our Windows Discussion.
See also a discussion of Rebuilding Door Windows.
~~~
Note: There are lots of Notes in this procedure. Be sure to read them all! This procedure is written for the one-piece "Cal-look" door windows, but much of it will apply to the wing-vent windows as well. (We have a procedure for stock windows in the works, so stay tuned!)
~~~
Procedure
Door Window Removal -
- Remove the door trim panels in accordance with our Door Trim Panel Procedure.
- Lower the window and remove the two 10mm bolts that attach the window lifter channel to the regulator. Hold the window to keep it from dropping, then remove the 10mm bolt at the bottom of the regulator which attaches it to the door.
- If you are not removing the window from the door, pull the bottom end of the regulator assembly back out away from the door (toward you), then carefully lower the window down and let it rest within the door frame at the bottom.
- If you are removing a one-piece ("Cal-look") window, it is easiest to remove the scrapers first, as the window lifter channel is too wide to fit between the scrapers.
Note: I would advise against removing the window scrapers unless you absolutely have to. Reinstalling them is a real pain.
- To remove the scrapers, move to the bottom of the window opening in the door and carefully, so as to not mar the finish, pry out the clips that secure the inner and outer window scrapers. Remove the scrapers and set them aside.
- If you are removing the window (one-piece), carefully lift the rear end of the window upward and tilt it so you can ease it diagonally up through the slot in the door, then pull it out from the top.
Note: Removal of the one-piece "Cal-look" window is up through the top as described; the regular "stock" window is removed through the bottom of the door.
- Remove the old felt channel by pulling it free of the clips in the slot in the door where the window resides when it's rolled up.
Door Window Installation -
Note: Before reinstalling the windows in the doors, you must first install the felt channels and the scrapers. Personally I think it is easier to install the felt channel before installing the scrapers.
Note: The felt channel is held in place by five or six steel clips that fit into holes in the slot the window will roll up into, all the way across the top down into the door on both ends. (See the picture below.) Be careful, the clips can draw blood if you're not careful.
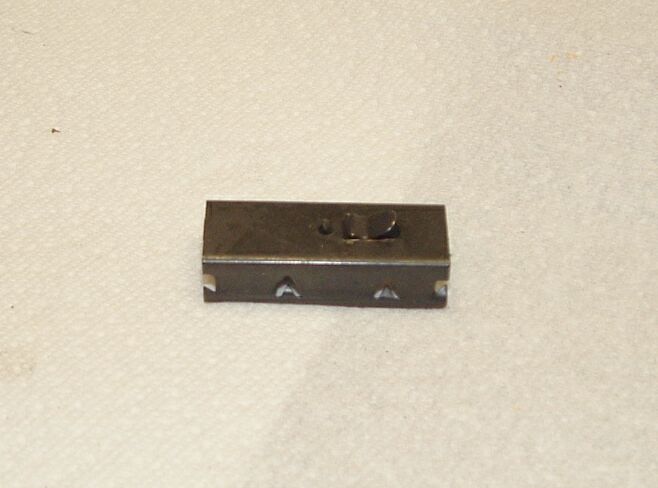
Felt Channel Clip
~~~
- Position the clips in the little holes in the window channel, with the little "hook" on the top facing the back of the car (or facing the ground, for the clips in the vertical part of the channel).
Note: Make sure these clips are installed securely. With the tab on the clip in the hole, push the clip into place with a screwdriver, pressing down on/against the end. When it's secure, you'll hear a satisfying "click."
An Important Note: If you have the one-piece "Cal-Look" windows (with the wing vents removed) you will have to install two extra clips at the top forward end of the door. Drill two new holes to accomodate these clips; I found the existing holes to be 19/64" (7.5 mm). (I found drilling the holes to be quite difficult -- I had a very hard time getting the drill bit started. It's very easy to mar your beautiful new finish!)
- To install the felt channel, place it loosely in the channel in the door frame and run it forward and down until you feel it butted up against the front of the door frame inside the door (or the vent window frame if you have the stock window), then feed it back the other direction and down into the door frame in the rear.
- Position the felt channel properly (especially in the corners), then carefully press the felt channel carefully into the clips with the heal of your hand, being careful not to deform it.
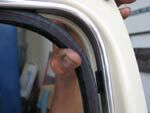
Felt Channel
~~~
- Go all around the felt channel and make sure it is not deformed but provides a clear channel about 1/4-inch wide for the glass to fit into.
- Install the outer window scraper. Be very careful -- it's sharp and really easy to ruin. Gently position the scraper in the window. Snap the clips into the holes along the inside of the slot that the window will reside in when rolled up, either with your fingers (if you have strong ones! :-) or with the flat side of a screwdriver.
- Install the inner scraper. This is the worst part of the process. You're going to have to slide the front part of the inner scraper past the window frame.
- If you have removed the regulator, reinstall it by guiding it up through the opening in the inside of the door, winder mechanism first. Push the regulator assembly up into the door until the regulator mounting bracket holes are lined up with the holes in the door.
- Install the two bolts that connect the winder to the door frame and the single bolt at the top of the regulator assembly. Don't tighten the bolts yet, and don't install the bolt that attaches the regulator to the bottom of the door yet, either.
Note: The regulator lives inside the door against the frame member that's closest to the passenger compartment. It is possible to incorrectly install the regulator and align the window glass so that the glass is blocked and cannot be raised up between the window scrapers. You'll know you have this problem when you find that you cannot raise the regulator high enough to permit you to install the bolts at the top and bottom. Also, you will not be able to raise the glass up between the scrapers.
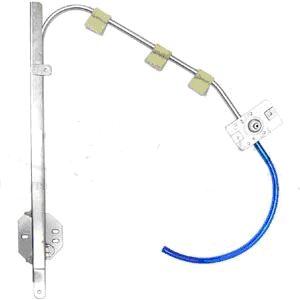
Window Regulator
~~~
- Reinstall the window (lifter channel installed in both of the cases below).
Case #1 - The one-piece window is completely out of the door -
- With the bottom bolt on the window regulator removed, carefully slide the window diagonally, rear end downward down through the slot in the door at the bottom of the window opening (between the scrapers).
- Straighten the glass in the window opening and raise it as high as you can in the opening. Make sure that the window fits properly into the felt channel, all the way around.
Note: Be sure that the glass clears the regulator and doesn't bind up between the regulator and the door frame. Again -- you'll know, because you will be hopelessly stuck! (Voice of Experience!)
- Lower the glass until the window lifter channel clears the door frame, and raise the regulator so as to align with the bolt holes in the window lifter channel. Install the bolts that attach the window lifter channel to the regulator but do not tighten them yet.
Case #2 - The glass has not been removed -
- If you did not remove the glass from the door, but lowered it to the bottom of the door while you did other things, tip the rear end of the glass upward and carefully ease it past the regulator and into the channel between the window scrapers at the rear of the window opening.
Note: You must be doubly sure that the window glass does not hang up on the regulator tube. It is very easy to have this interference, and it can be very exasperating! One-piece "Cal-look" windows are a mixed blessing!
- Once you have the rear end of the glass protruding up through the scrapers, lift the forward end of the glass and slide the entire window up between the window scrapers. Raise it as high as you can in the opening to make sure the window fits properly into the felt channel, all the way around.
- Lower the glass until the window lifter channel clears the door frame, and raise the regulator so as to align with the bolt holes in the window lifter channel. Install the bolts that attach the window lifter channel to the regulator but do not tighten them yet.
- Attach the bolt that holds the bottom end of the regulator to the door. Once you have everything properly aligned, tighten all of the bolts.
- Check the operation of the regulator assembly, and while doing so, make sure that the window rides in the felt channel all the way up. If necessary, loosen the bolts attaching the lifter channel to the regulator and readjust the window a little and recheck. Repeat this process until the regulator operates satisfactorily.
- Reform (and reattach!) the felt channel as necessary.
Note: A clean paint spatula works well for doing any necessary reforming of the felt channel.
- Despite your best efforts, the felt channel may become detached, especially in the corners and at the front of the door frame. I found that a good strong glue worked well for attaching these troubling spots. Roll the window all the way up to hold the felt channel in place while the glue dries.
- Install the protective plastic sheeting on the door frames in accordance with our Protective Plastic Sheeting procedure.
- Reinstall the door trim panels in accordance with our Door Trim Panel Procedure.
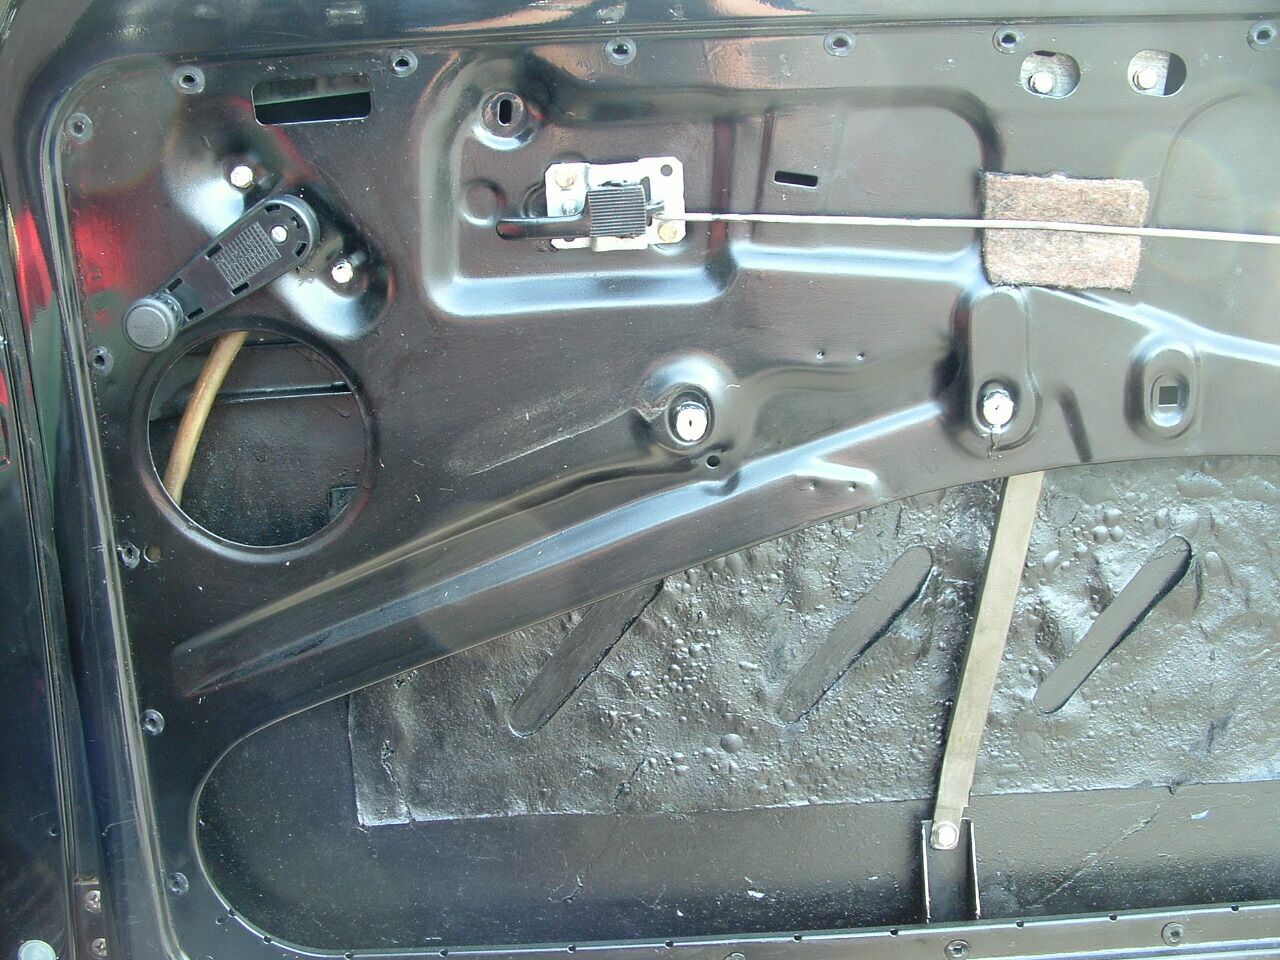
Completed Door Innards
~~~
Congratulate yourself! You have just completed one of the more
difficult tasks your Bug can throw at you!
*
* * * *
|
|
